Help! My Dot Isn’t Moving
If you are having trouble with a tracker that is not updating, please run through the following steps below. You can find tracker user guides, as well as instructional videos on our Tracker Instructions page. For help on using our maps, you can head over to our Support Site.
This page is designed to help participants. If you are an event organiser, please visit the tracker troubleshooting guide in our Manager Support site (accessible via your map manager).

Queclink Trackers
- Reliant on cell coverage
- Buffer data when not connected
- Do not need to face the sky
- Connected directly to our servers
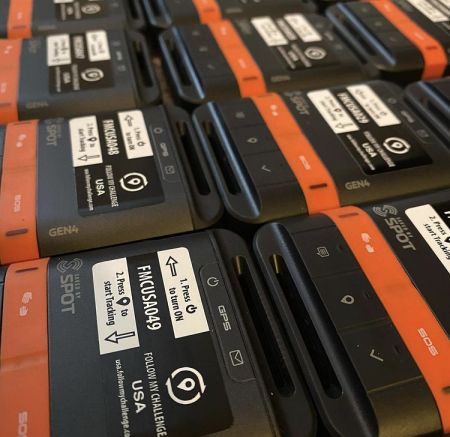
Check that you have the correct tracker
All our Queclink trackers are labelled with unique IDs. You will usually find these on the top (next to the power button) and on the back of the tracker. Check that this number corresponds to the tracker ID listed in the map Leaderboard. You can find this in the tags column.
Check that your tracker is turned on
You can verify your tracker is turned on by shaking it (in case it was asleep) and waiting to see if the green light start flashing. This should happen within a few seconds of waking the tracker if it was asleep. This may be hard to see in bright conditions, so it is recommended you check in the shade if outside.
If no lights appear then you need to power the tracker on. Hold down the small recessed power button on the smallest side of the tracker for several seconds. Once the lights begin flashing, the device is powering on and you can release the power button. Watch this video on how to power on a tracker.
If you are unable to power your tracker on or are unsure if it is turned on already, the safest way to ensure it is on is to plug the tracker into a powerbank to charge it. This will power the device on if it is off, but it will not do anything if it is already on.
Check the positioning of your tracker
It is important that Queclink trackers are not beneath anything solid or close to other electronic devices. Check the positioning of your tracker, ensuring there is nothing solid (including your body) between the device and the sky.
Ensure the tracker is not next to or under phones, navigation devices or battery packs. Ideally, it should have a clear view of the sky, with just fabric or similar items above it. You can watch this video on positioning your tracker.
Restart your tracker
Restarting your tracker can often solve connectivity issues. Begin by verifying that the tracker is switched on. After shaking the tracker (in case it was asleep), you should see a green light start flashing. This may be hard to see in bright conditions, so it is recommended you check in the shade if outside.
To restart the tracker, hold down the small recessed power button on the smallest side of the tracker for several seconds, until the red light begins flashing. This initiates the shut down procedure and this may last up to a minute or so if the device is having connectivity issues, as it will attempt to send a power off message before shutting down. You can watch this video on how to power off a tracker.
Once the lights have stopped flashing and the device is off, hold down the same power button. Once the lights begin flashing again, the device is powering on and you can release the power button. You can watch this video on how to power on a tracker.
Request a Network Reset
You can also ask the event organiser to perform a network reset via the map manager, which they have access to. And if they cannot, then they can ask us to do so. This initiates a network-level reset, deleting the device’s connection and forcing a re-establishment of the connection to the network.

SPOT Trackers
- Reliant on Globalstar satellite coverage
- Do not buffer data
- Must be oriented upwards
- Connected via XML feed
Check that your device is tracking
Each SPOT tracker is slightly different, but the Gen3 and Gen4 trackers are the most commonly used devices. They function almost identically from a user perspective.
When in tracking mode, the GPS LED will blink green when the tracker sees the GPS satellites and will continue blinking while obtaining your GPS location. Once your GPS location is obtained, the GPS LED and Message Sending LED will both blink green indicating that the device is sending your track as a waypoint. The Message Sending LED continues to blink green until the next scheduled message or until the mode ends.
If you cannot see these LEDs blinking green, then you can start tracking mode by holding down the track button until the function LED blinks green.
If you LEDs blinking red then it either means the device is unable to get GPS or unable to send your waypoint. This usually occurs when the tracker is obstructed overhead or oriented incorrectly. You should check the positioning of your tracker (see below).
You can find detailed user guides for all SPOT trackers via their support site here.
Check the positioning of your tracker
SPOT trackers are fairly sensitive to how they are positioned and this will impact their ability to transmit tracking points. The satellite antenna lies directly under the SPOT logo. For best results, position the unit so the SPOT logo is facing up towards the sky in a horizontal position with a clear view of the sky.
Your SPOT tracker should be attached outside of bags or clothing, ensuring the tracker is not next to or under phones, navigation devices or battery packs. Also make sure your body is not positioned between the tracker and the sky. If you are in dense tree cover, an urban area or a narrow valley, try to find a spot that is clear of overhead obstructions.
Mounting your SPOT tracker on a bag strap (unless on top of the shoulder) while cycling is advised against as it will face down when you lean forwards.
Check that your XML feed is active and public
For us to be able to pull data from your SPOT tracker, you must have a valid subscription that is enabled. Without a subscription, your tracker will not work.
We then rely on the following information from you:
– ESN (this is the device identifier)
– XML Feed ID (this must be active and public)
If you are unsure on how to obtain these, please consult these guides provided by SPOT:
How to find your ESN (see page 5)
How to create a public XML feed
We also have a step-by-step guide to setting up your public XML feed here. You can use the tool below to validate that your XML feed ID and ESN are correct.
The XML ID itself should be a 32-character alphanumeric value (e.g. 0AbCdE1FgHiJ2KlMnOpQrStUvWxY3ZqR) and your ESN should be an 8-digit number, with a hyphen after the first digit (e.g. 0-1234567)
Validate SPOT XML Feed & ESN
Use this tool to validate that your XML feed is correctly configured and you have the correct ESN

Garmin inReach Trackers
- Global satellite coverage using Iridium network
- Ability to buffer limited amount of data
- Antenna should point upwards
- Connected via MapShare KML feed (or API)
Check that your device is tracking
How to check tracking varies between devices, but the most common inReach tracker is the inReach Mini or Mini 2:
To verify that tracking is running, simply press OK while on the home screen. If you see the option “Stop Tracking” then your device is already tracking. If you see “Start Tracking” then you need to select this to begin tracking.
You can find detailed instructions on using various inReach models via the Garmin support site here.
Check the positioning of your tracker
Garmin inReach devices are less sensitive to positioning than SPOT trackers. However, their aerial should still be positioned upwards and they should be attached outside of bags or clothing, with nothing blocking the view of the sky.
Ensure the tracker is not next to or under phones, navigation devices or battery packs. And make sure your body is not positioned between the tracker and the sky. If you are in dense tree cover, an urban area or a narrow valley, try to find a spot that is clear of overhead obstructions.
Check that your MapShare KML feed is active and public
For us to be able to pull data from your inReach tracker, you must have a valid subscription that is enabled. Without a subscription, your tracker will not work.
We then need the following information from you:
– IMEI (this is the device identifier)
– MapShare KML Feed (must be public)
If you are unsure on how to obtain these, please consult these help pages provided by Garmin:
How to find out your IMEI
How to set up MapShare KML Feed
The MapShare KML feed will appear as a URL, typically in a format similar to this: https://share.garmin.com/Feed/Share/XXXXXX. You can use the tool below to validate that your KML feed and IMEI are correct.
Validate Garmin inReach MapShare KML Feed & IMEI
Use this tool to validate that your MapShare feed is correctly configured and you have the correct IMEI